
Project Description
In this second part, let us introduce a practical example to integrate and use FlashRunner DLLs in a TestStand application.
Goals
This example will proceed by following these steps:
1.FlashRunner DLLs importing and integration
2.Open LAN communication
3.Dynamic memory command
4.Run project command
5.Close LAN communication
6.Exit condition
This covers most of the DLLs potential and it is very useful to let the user understand how easy, but, at the same time, powerful and versatile they are.
Importing and integrate FlashRunner DLLs
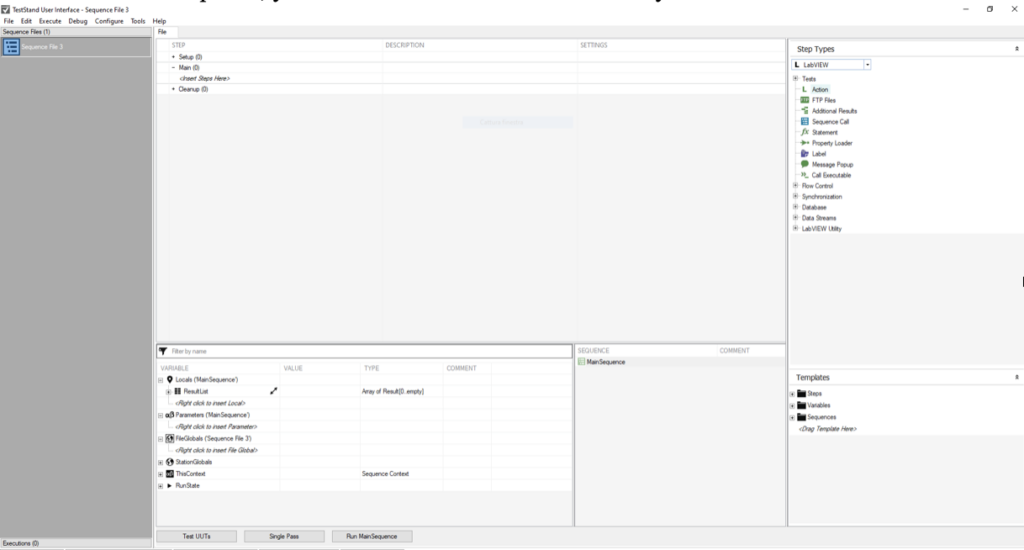
Once TestStand is opened, you will have this window in front of you:
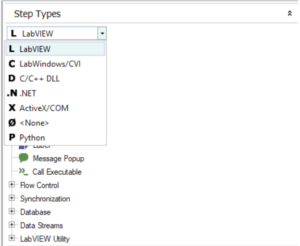
On the right side, below “Step types”, click on the drop down menu and select .NET
Now what we would like to do is to open a LAN communication with the FlashRunner in the setup area of the sequence. To do this let us drag and drop “.N Action” in that area and let us name it as you see in the image below.

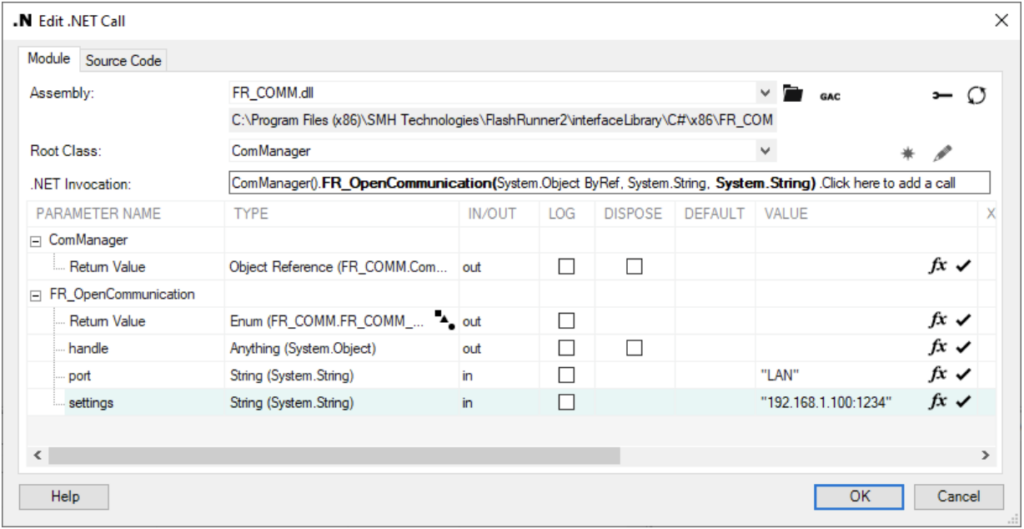
Right click on it and select “.N Specify Module”; a window will pop up that should be filled:
1.“Assembly” field should contain the file “FR_COMM.dll”
2.Once the dll is imported, in “Root Class” field you can select the object ComManager
Now you can place in the “.NET Invocation” field the object ComManager followed by the call FR_OpenCommunication.
Now the input parameter “port” should contain the string value “LAN” and the input parameter “settings” should contain the IP of the FlashRunner followed by “:1234”.
Let us take care of the output parameter, so close this window for now.
Create three local variables in the down part of the main window like in the picture:
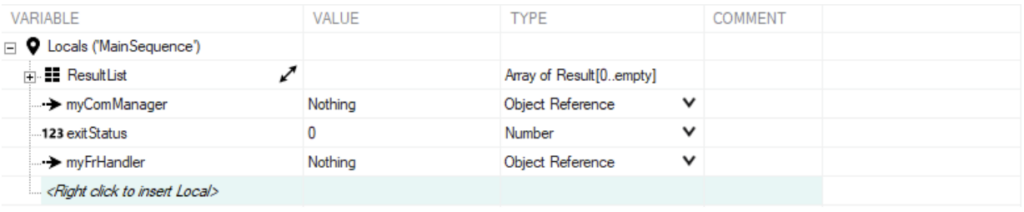
1.myComManager is Object Reference type as myFrHandler
2.exitStatus in Number type
Let us use them as return value of the action we created before.
To do that open again the “.N Specify Module” window by right clicking on the action and selecting this item from the menu:
In the column “VALUE” of the ComManager return value select Locals.myComManager which refers to the local variable we just created.
Do the same for the FR_OpenCommunication handle return value and select Locals.myFrHandler and for the first return value select Locals.exitStatus

Creating a command and getting the answer
What we want to do now is to populate the main area of the sequence with two commands that have been chosen to show the versatility of the DLLs: one command will execute a .prj file which is basically a group of commands, while the other command is emblematic to let the user understand that it is not strictly necessary to run a .prj file stored inside the FlashRunner, it is also possible to run single commands, making the sequence extremely flexible.
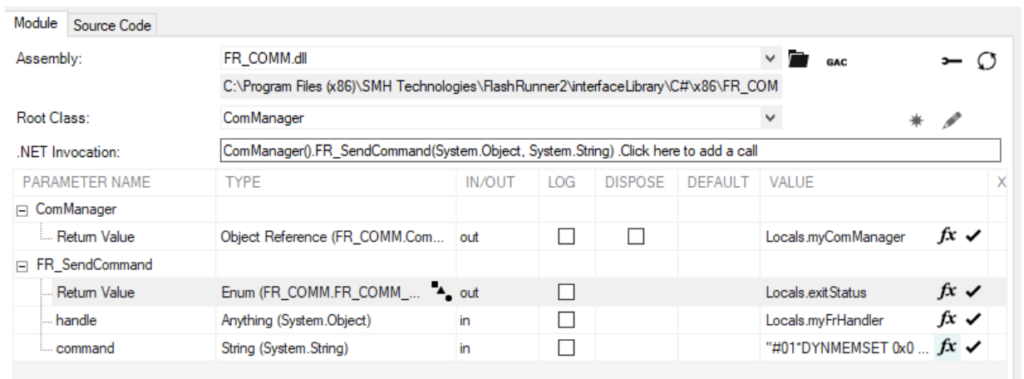
As we previously did, let us drag and drop an action in the main area and let us call it “Set Dynamic Memory”: this is a single command. Every command you can execute from a .prj file can be executed separately as well through DLLs.
Let us open the “.NET Specify Module” and fill the fields: when selecting “.NET Invocation”, select ComManager object again followed by the call “FR_SendCommand”.
The return values are the same of the previous action, fill them in the same way.
Regarding the only input value of the “FR_SendCommand” routine, we will fill it with he following string: “#01*DYNMEMSET 0x0 0x4 0xAA 0xBB 0xCC 0xDD”.
It is necessary to always receive the answer from the FlashRunner after a command is set so that the “answer” FIFO will flush everytime. Anyway, receiving the answer is also useful to make decisions during the sequence through if-else instances, to manipulate data and other customer-based intentions.
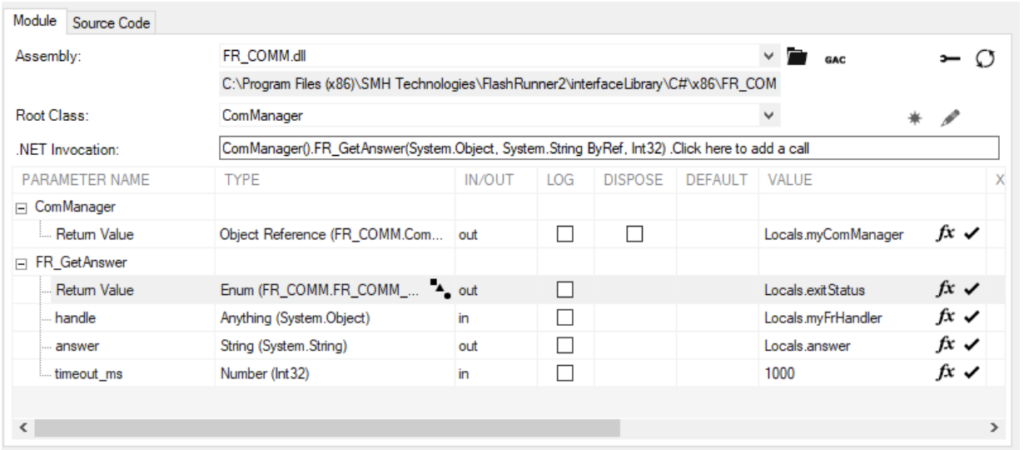
To do that, repeat the process of adding an action and in the “.NET Invocation” select to call the FR_GetAnswer function on the ComManager object.
You will notice that the ouput parameter answer is a string type; to fill this create the local variable answer of type string and select it for this parameter.
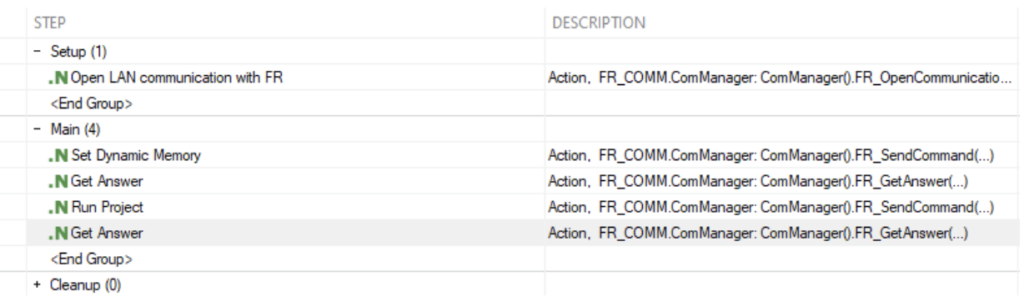
Again drag and drop an action in the main area, call it “Run Project” and edit the “.NET Invocation”
as did in the “Set Dynamic Memory” action: the only parameter to change is the input vlaue which now will be filled with the string “#01*RUN flashUUT.prj”.
We can copy the “Get Answer” action and paste it after the “Run Project” action as it is.
The result should be the following:
In the Cleanup area of the sequence we will close the communication.
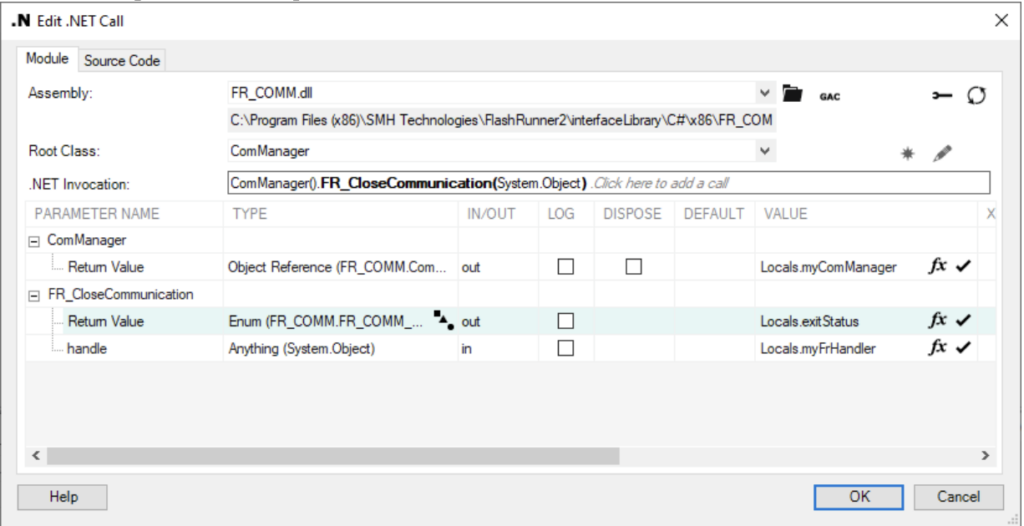
As we did many times now, select FR_CloseCommunication on the ComManager object in the “.NET Invocation” field and fill the variables required: you should have all of them.
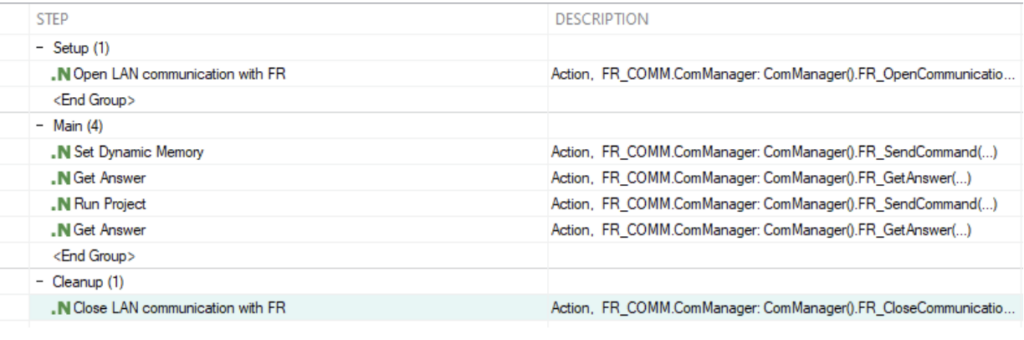
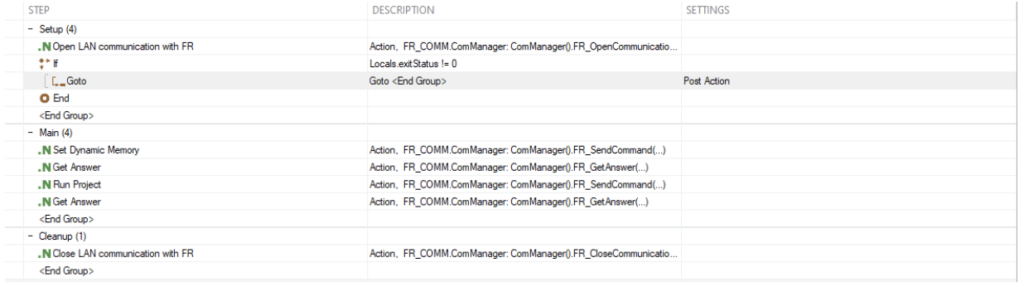
The end result of the sequence will be:
Adding an exit condition
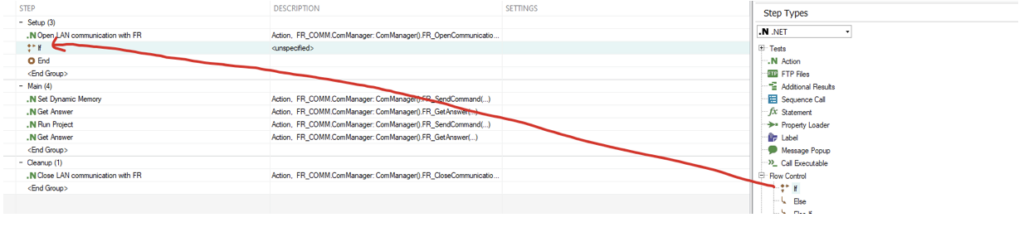
Let us show now how to control a simple failure during the “Open LAN communication with FR” action. On the right side, there is a “Flow Control” drop down menu: open it.
Take drag and drop the “if” statement right below the “Open LAN communication with FR” action.
Double click on it, press the button “Configure If Condition”
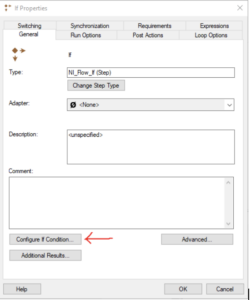
Edit it, minding that the return value is the local.exitStatus variable.
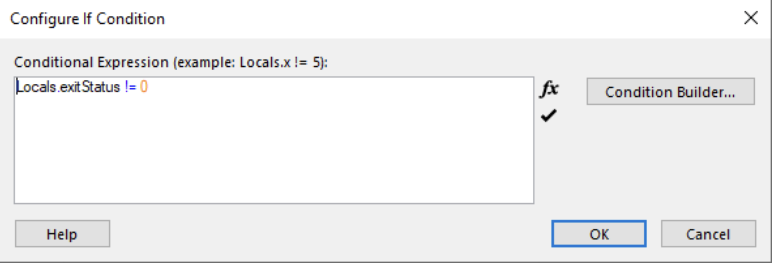
The if condition is faulty, so if we enter in that, it means the communication could not be opened an we can insert a “Goto” instruction (always from the “Flow Control” drop down menu) to jump at the <End Group>.
Conclusions
TestStand allows you to have very flexible and versatile test sequences; FlashRunner DLLs does not limit the power of this environment.
From these little blocks, it is possible to create very advanced and complex sequences, considering also the fact the FlashRunner programming system is extremely configurable from a parameters/commands/answers point of view.
Enjoy and have fun exploring the interactions between these two close environments.